
Search for your product name or keyword
W1209 Temperature Controller Case Assembly Instructions
Here are the basic steps to follow in order to assemble the W1209 acrylic enclosure:
Remove the protective paper from the acrylic pieces.
Insert one of the larger M3 screws into one of the 4 mounting holes in the corners of the W1209 module. Hold one of the round acrylic spacers on the back side of the module and using a screwdriver, thread the screw into the acrylic spacer to hold it in place. Repeat for all 4 corners of the module.
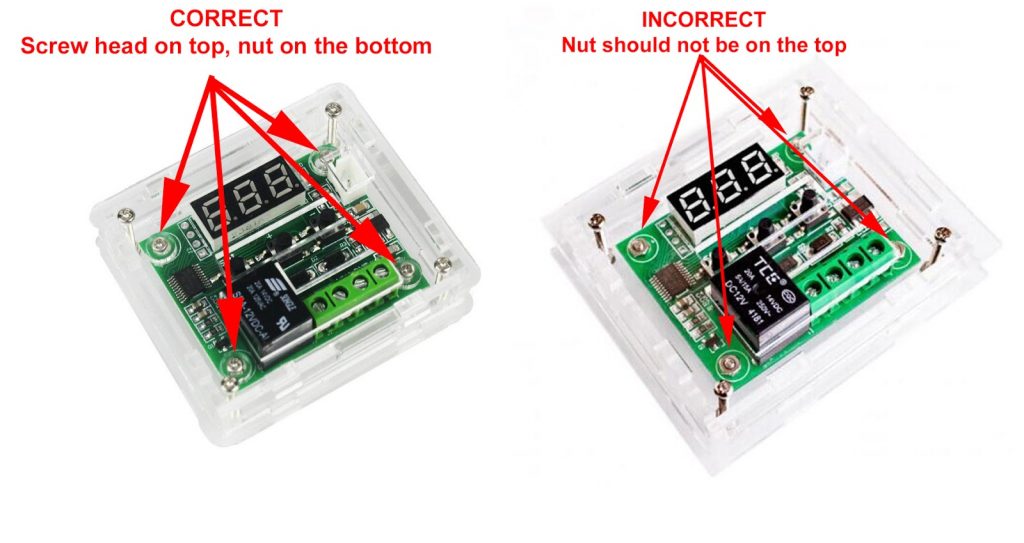
Please note that the screws in the 4 corners of the circuit board that secure the board to the case should be installed so that the screw heads are on top, against the circuit board. DO NOT install them with the nuts against the circuit board. The nuts can contact electrical traces on the circuit board and short it out, destroying the W1209.
Place the module on the bottom piece of acrylic which is the more solid of the two large pieces and attach it using the 4 larger (M3) nuts.
Insert each of the 4 side pieces into the slots in the bottom piece of acrylic. Ensure the side piece with the cut-out is placed on the side with the screw terminals for wire access.
Place the other larger acrylic piece on top and guide the tabs into the slots in the top piece.
Install the 4 long M2 screws into the 4 corners of the case and fasten them with the nuts. Do not over-tighten or the acrylic will bend.
For instructions on installing and operating the W1209 temperature controller, click here: W1209 12V -50° to 110°C Digital Thermostat Temperature Controller Module Installation and Operating Instructions.
Copyright © 2017-2022 Envistia Mall
EM-THERM-0004