
Search for your product name or keyword
Digispark ATTINY85, ATTINY85 USB-C and MicroUSB Development Boards (Arduino Compatible)
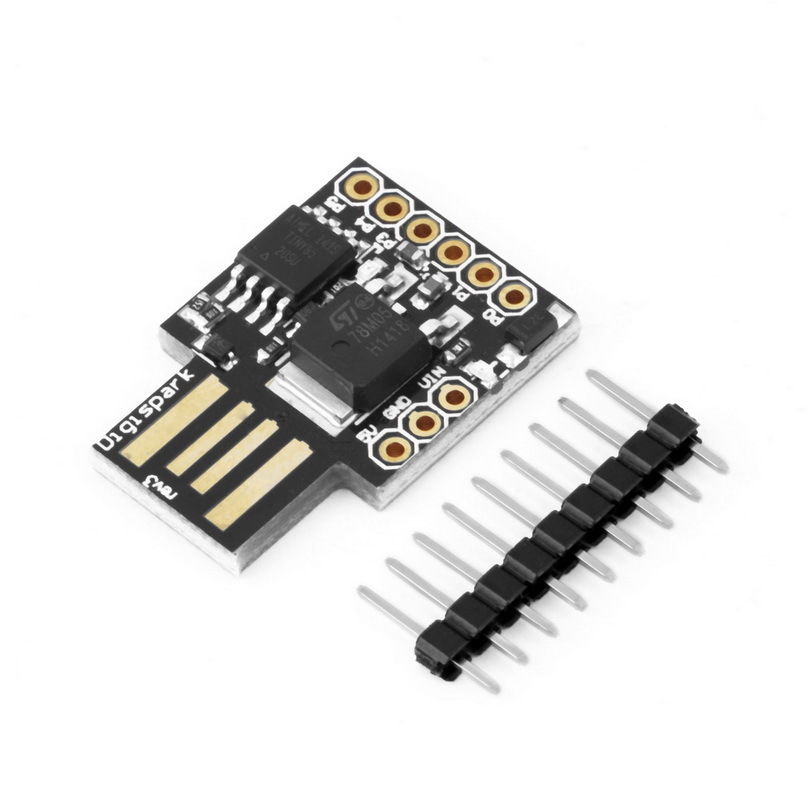 Digispark is a tiny, Arduino compatible development board using the ATMEL ATtiny85 microcontroller. It has its own USB bootloader and built-in USB capability, allowing you to program it with the Arduino SDK and also use it as a native USB device. It is similar to the Arduino line, only cheaper, smaller, and a bit less powerful.
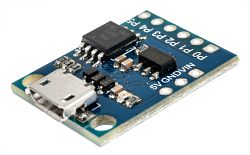 The Digispark USB-C and Micro USB versions are a modification to the standard Digispark board using a USB-C or MicroUSB port rather than USB pins as part of the PCB. It can be connected to the PC using a standard USB-C or MicroUSB cable.
ATTiny85 Development Board Features
- Support for the Arduino IDE 1.0+ (OSX/Win/Linux)
- Power via USB or External Source – 5V or 7-16V (12v or less recommended, automatic selection)
- On-board 500ma 5V Regulator
- Built-in USB (and serial debugging)
- 6 I/O Pins (2 are used for USB only if your program actively communicates over USB, otherwise you can use all 6 even if you are programming via USB)
- 8k Flash Memory (about 6k after bootloader)
- I2C and SPI (vis USI)
- PWM on 3 pins (more possible with Software PWM)
- ADC on 4 pins
- Power LED and Test/Status LED
Installing Digispark Board Support in the Arduino IDE
Support for the Digispark board must be added to the Arduino IDE before attempting to program the Digispark board with the IDE. To do so:
- In the Arduino IDE, go to the “File” menu and select “Preferences”
- In the box labeled “Additional Boards Manager URLs” enter:
http://digistump.com/package_digistump_index.json
and click OK.
Note: If you already have additional URLs entered in that box, then click the button on the right of the box and enter this URL on a new line - Go to the “Tools” menu and then the “Board” submenu – select “Boards Manager” and then from the drop down select “Contributed”
- Select the “Digistump AVR Boards” package and click the “Install” button.
- When the download and installation are complete it will show “Installed” in the Board Manager next to that item on the list
- WINDOWS USERS: When completed, the install with pop up a Driver Install Wizard window. Please click “Next” on this Window to install the drivers for Digistump Boards (If you already have them installed, this installer will update them and install any that are missing)
- With the install complete, close the “Boards Manager” window and select the Digispark from the Tools→Boards menu. “Digispark (Default – 16.5mhz)” is the board that should be selected by all new users.
For additional information on installing Digispark support in the Arduino IDE:
Here is a tutorial: http://envistia.info/digisparkconnecting
Brainy-Bits also has an excellent Digispark installation video that covers the installation of the Digispark board manager in the Arduino IDE. See the link in the Resources section below.
Troubleshooting The Digispark Using the Arduino IDE
The Digispark only shows up as a programmable device for 5 seconds, after that it will start running its code (when it is new and un-programmed this means it will blink) and disappear or act like the USB device you programmed it to act like. For this reason always remember to unplug the Digispark before hitting upload and plug it in when the Arduino IDE requests you to. If you get an error that assertion failed or micronucleus crashed during upload then you probably did not unplug your Digispark before uploading.
If it won’t upload:
Did you set your board AND programmer to Digispark in the Arduino IDE?
Did you install the right driver?
Try following the steps shown in this video from Brainy-Bits, as it addresses most of the problems encountered during the driver installation on Windows, including needing to run a different installer on 64 bit versions of windows, and how to finish installing the drivers without having to plug and unplug your digispark multiple times.
If the driver is not fully installed it will be listed as an Unknown Device under Other Devices in the Windows Device Manager. To fix it:
In the Windows Device Manager click on View >> Show Hidden Devices
Find the Unknown Device under Other Devices that is greyed out. Right-click on it, select Update Driver Software, and point the dialog box to your folder with the Digistump drivers that you previously downloaded. Windows will reinstall the driver, and in many cases, this resolves the upload problems. This is also documented in Brainy-Bits’ video referenced above, in the “Installing Drivers” section.
For more troubleshooting information see the Digistump tutorial at http://digistump.com/wiki/digispark/tutorials/connecting and Brainy-Bits video at https://www.youtube.com/watch?v=MmDBvgrYGZs.
Programming the Digispark using the Arduino IDE
The Digispark programs with a different procedure than other Arduino-compatible products:
- From the Tools menu select Board→Digispark (Default – 16.5Mhz)
- Write some code, open your code, or open a Digispark example.
- Do not plug in your Digispark before invoking the upload!
- Press the upload button. The bottom status box will now ask you to plug in your Digispark – at this point, you need to plug it in – or unplug and replug it.
- You’ll see the upload progress and then it will immediately run your code on the Digispark.
- If you unplug the Digispark and plug it back in or attach it to another power source there will be a delay of 5 seconds before the code you programmed will run. This 5-second delay is the Digispark Pro checking to see if you are trying to program it.
Additional Digispark Resources & Videos
Digistump Digispark Wiki: http://envistia.info/digisparkwiki
Digistump Arduino Releases: http://envistia.info/digistumparduino
Arduino IDE: http://envistia.info/arduinoide
ATMEL ATtiny85 datasheet: http://envistia.info/attiny85ds
How To Program A Digispark (ATTINY85) from Simple Electronics on YouTube:
Installing Drivers and Programming the DigiSpark ATtiny85 dev boards – Tutorial from Brainy-Bits on Youtube:
Copyright © 2017-2025 Envistia Mall
www.envistiamall.com
EM-MICRP-0005 / EM-MICRP-0006