
Search for your product name or keyword
NodeMcu V3 LUA WeMos Compatible 32MB Flash WiFi Development Board
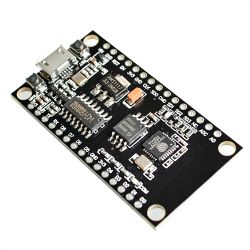 This WeMos-compatible NodeMCU IoT development board is based on the ESP8266 system chip from expressif, upgraded with 32M of flash memory. It is compatible with Lua-based ESP8266 NodeMCU boards. The additional memory this unit has allows for bigger projects with more complicated and large libraries.
It features a CH340G onboard USB-TTL Serial converter and a Micro-USB female connector. It comes with two sets of 15 pins headers to give you the freedom of choosing whether to use the connectors or to solder directly onto the pin holes for a more compact approach.
Specifications
- Capable of WIFI networking (IOT): Access-Point, station or Web Server etc.
- Uses simple LUA based programming language.
- Supports Arduino IDE
- Event-driven API for network applications
- 9 GPIO pins D0 – D8 featuring PWM functionality, I2C and SPI communication
- Input Operating Voltage: 5 – 9 VDC
- Dimensions: 49 x 26 x 4 mm ( L x W x H) (without the headers)
Reference:
NodeMCU Firmware & Development Kit Website: http://envistia.info/nodemcu
ESP8266 Community Forum: http://envistia.info/esp8266-forum
How to program the ESP8266 using Arduino IDE tutorial videos:
http://envistia.info/youtube-nodemcu-blink
http://envistia.info/youtube-nodemcu-gettingstarted
Arduino Software (IDE) download link: http://envistia.info/arduinoide
The CH340G USB drivers may need to be installed on your computer before using this UNO board with the Arduino IDE. If the Arduino IDE cannot communicate with your board, it is probably because the CH340G driver is not installed on your computer.
To install the CH340G driver on your computer:
The CH340 USB IC is made by WCH. You can find the latest version of their drivers in their English translated website here:
http://www.wch-ic.com/downloads/CH341SER_ZIP.html
Click on the “download” button on the WCH page to download the ch341ser.zip file to your computer.
Unzip (extract) the ch341ser.zip file.
Run the Setup application in the CH341SER folder of the unzipped file. See the screenshot below:
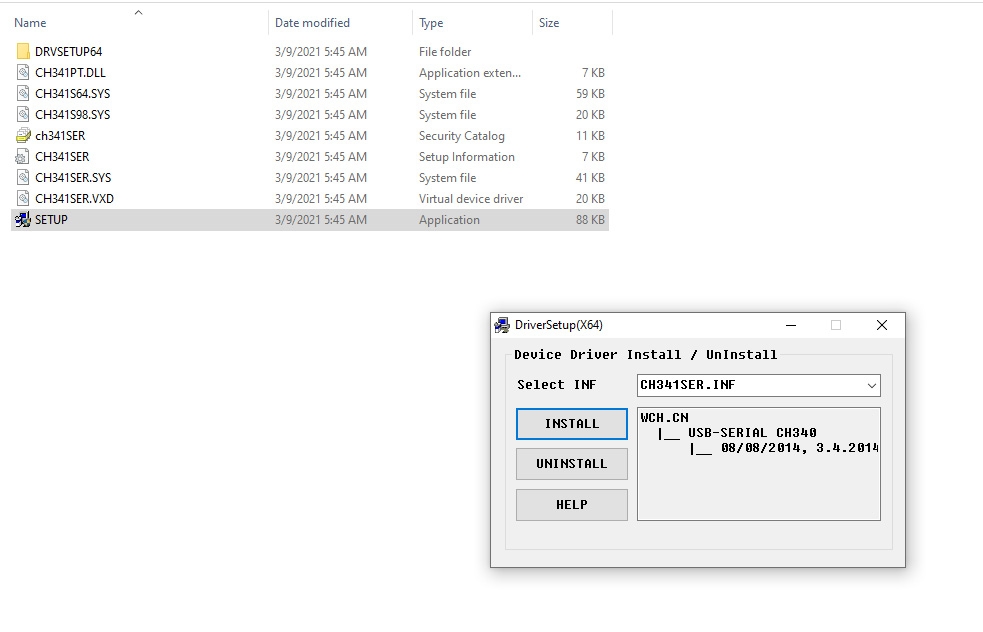
Click the “Uninstall” button first to remove any old versions, then click on the “Install” button.
CH340G Driver Verification for Windows:
To verify that your CH340G driver is working, you should see a difference in the Windows Device Manager and Arduino IDE Ports after plugging the NODEMCU board with a CH340 into a USB port on your computer.
Device Manager
To check that the CH340 associates to a COM port, open the Windows Device Manager. You can click the Start or ⊞ (Windows) button and type “device manager” to search for the application.
After opening the Device Manager, you will need to open the Ports (COM & LPT) tree. The CH340 should show up as USB-SERIAL CH340 (COM##). Depending on your computer, the COM port may show up as a different number.

Arduino IDE
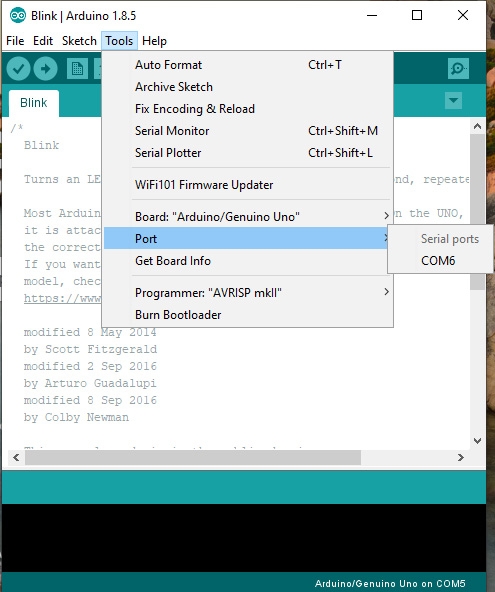
If you have the Arduino IDE installed, you should also see a change in the number of available COM Ports (you may need to restart the Arduino IDE for the board to populate). Without the CH340 connected to your computer, in the IDE click on Tools > Port. Take note of the Serial Ports available:
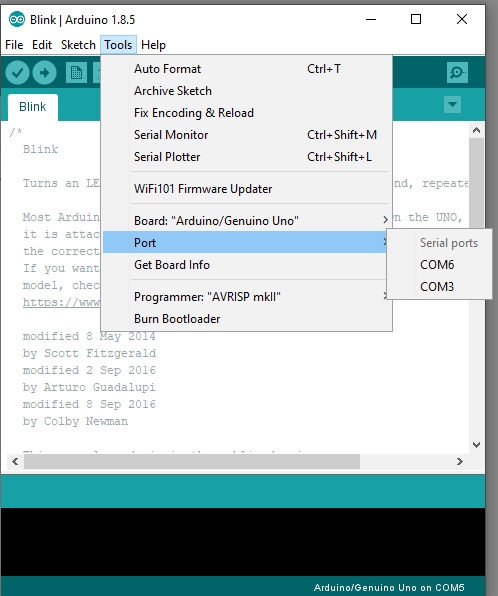
Connect the NODEMCU board with the CH340 to your computer’s USB port. Click somewhere else on the screen for the menu to refresh itself. Then go back to Tools > Port. A new COM port should appear. By process of elimination, the CH340 should have associated to the new COM port. Select this COM port in order to connect the IDE to your Arduino board.
In the example shown in these two screen shots, the new NODEMCU CH340 board is associated to COM Port 3.
Copyright © 2018-2021 Envistia Mall
http://www.envistiamall.com
EM-MICRP-0017